
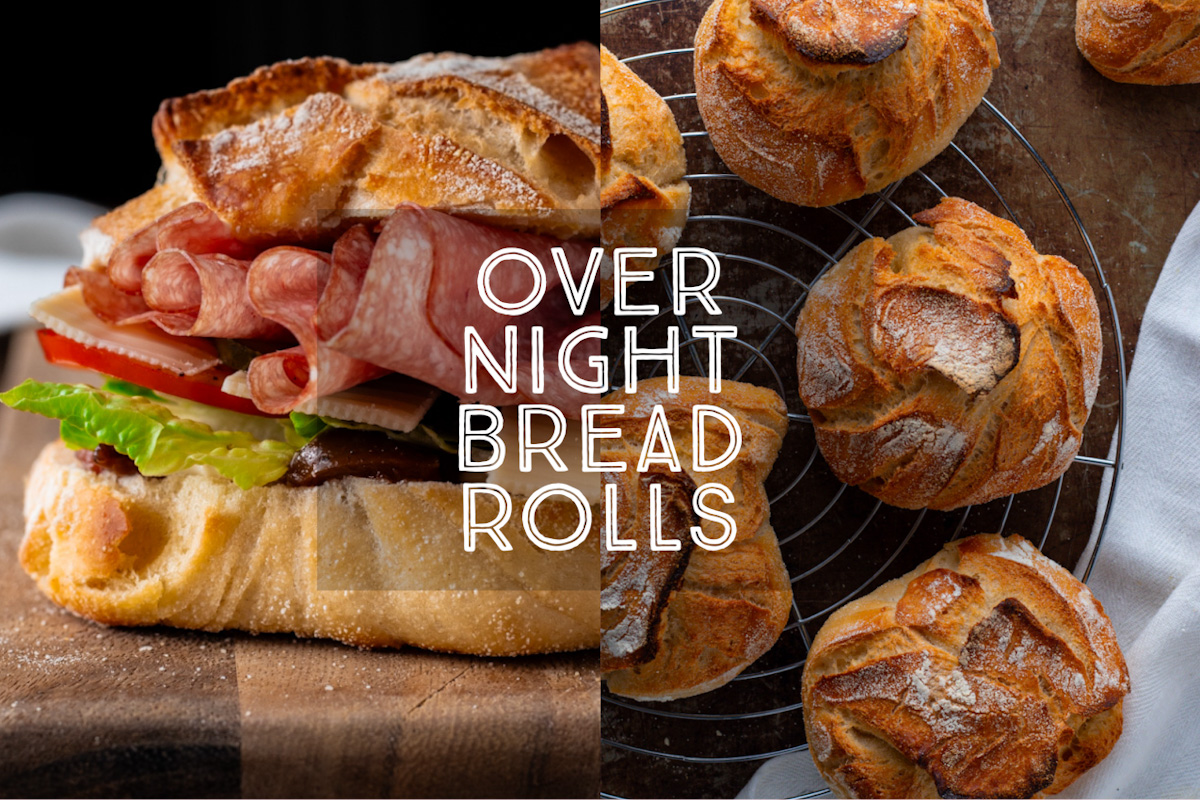
Easy Overnight Bread Rolls
I love fresh bread in the morning, but I love it even more when it is as easy to make as these overnight bread rolls. No kneading, an overnight rise in the fridge, then a quick shape and they're into the oven in time for breakfast. Easy and delicious with a wonderfully crunchy crust, this recipe is ideal for bread-making beginners.
Nothing is quite so hunger-inducing as the aroma of freshly baked bread wafting through the house. We all love fresh bread in the morning, but getting out of bed at 4am to bake is not my idea of a very good time!
Luckily with my recipe for Easy Overnight Bread Rolls, you can have fresh bread every morning without the stress.
TABLE OF CONTENTS
▼
How This Recipe Works
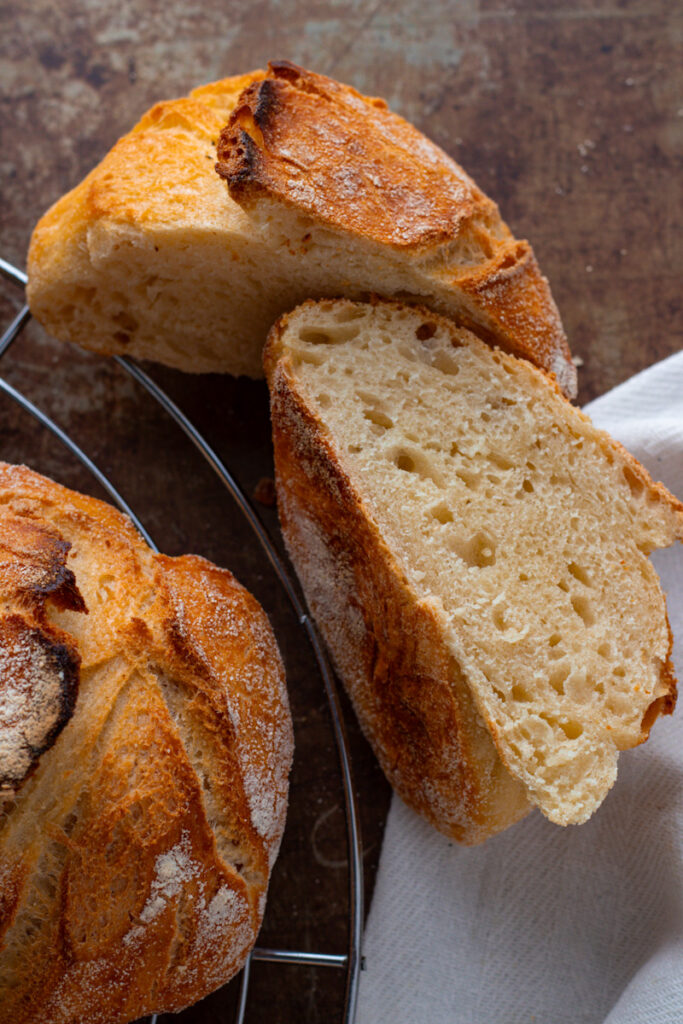
No Knead bread was popularised by Jim Lahey and has taken the bread-baking world by storm. By making very high-hydration dough (that means lots of liquid) and giving the dough a long, cold rise, we can do away with kneading the bread. It’s just a matter of stirring it all together, leaving it in the fridge overnight and quickly shaping it in the morning.
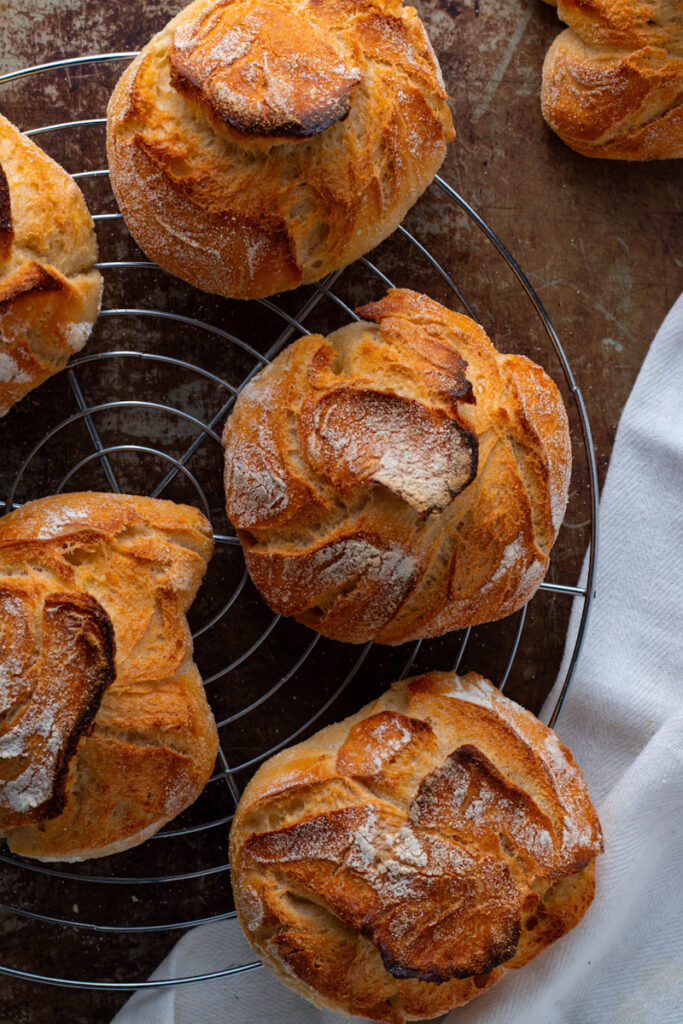
This sort of process is ideal for smaller loaves like bread rolls. As long as you are gentle with the dough, they don’t need a second rise after shaping, meaning you can whip them up in no time in the morning, then put the cold dough straight in the oven.
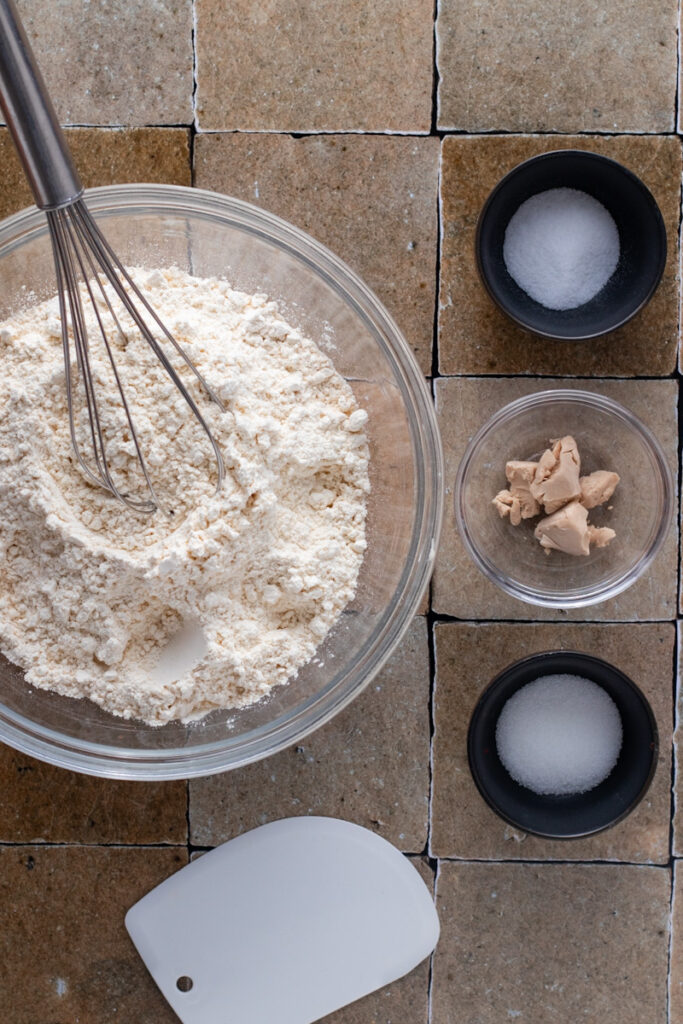
Ingredients
To make these deliciously crusty bread rolls, you need the following ingredients:
- Flour: In Germany, I use 550 Wheat flour or 630 Spelt Flour. You can use All-Purpose or Bread flour with similar results. Wholemeal flour and Rye flour behave differently, so if you want to use these flours, only mix in a small percentage, otherwise you won’t get enough rise in the finished roll.
- Yeast: For best results, you can’t beat fresh yeast. Fresh or Cake Yeast is cheap and easily found in Europe, but slightly trickier to find in the US. See the recipe card for suggestions on where to find it. It can be replaced with Instant yeast.
- Salt: I use fine sea salt in my baking as it dissolves easily into the dough.
- Sugar: Sugar adds flavour to dough as well as giving the yeast a helping hand. It’s not strictly necessary, so you can leave it out, though I’d give the dough an extra half an hour at room temperature in the morning to give the yeast a chance to wake up.
- Oil: To stop the dough from sticking to the bowl. I use olive oil, but any vegetable oil will do.
- Water: Plain old tap water is perfect for this bread, though if the water is heavily treated where you live, consider using bottled instead.
Instructions
No Knead recipes like these bread rolls are so easy! There are only 3 simple steps to homemade bread:
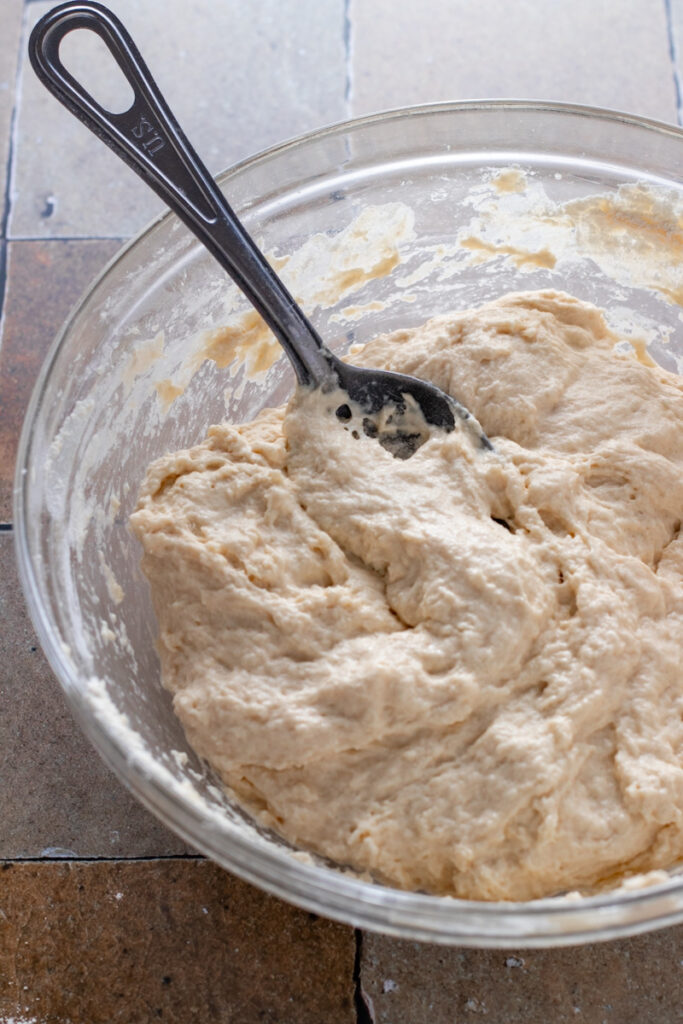
- Whisk the dry ingredients together in a large bowl, then mix the yeast and water, add to the bowl and stir until you have a wet and shaggy dough. Turn the dough out onto an oiled bench top, oil the bowl really well (this is important), then return the dough to the bowl, cover and chill for 8-12 hours.
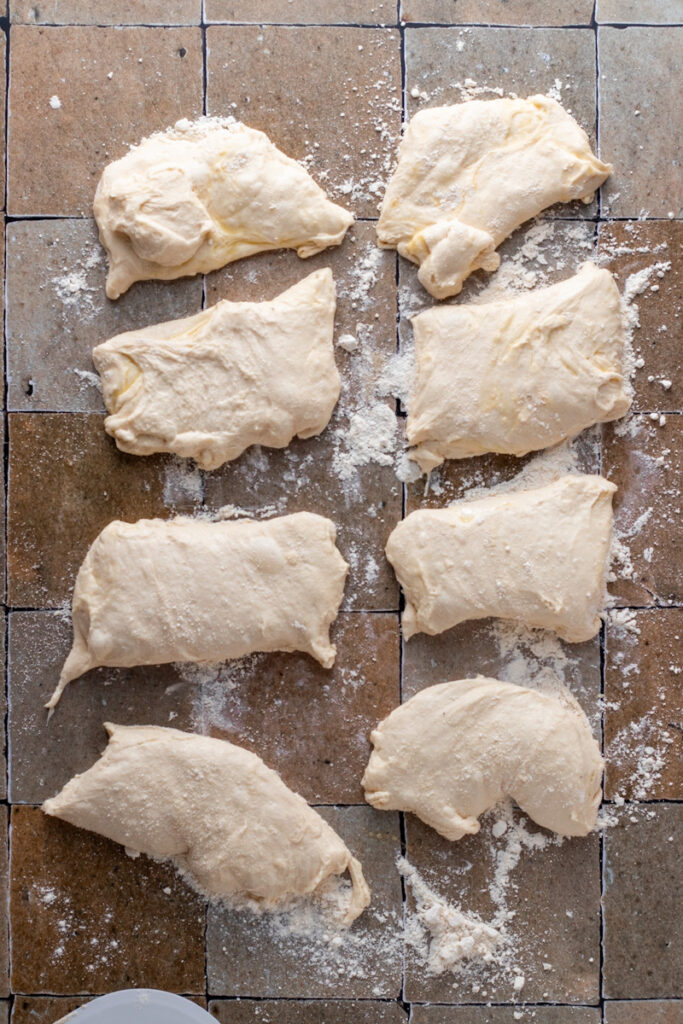
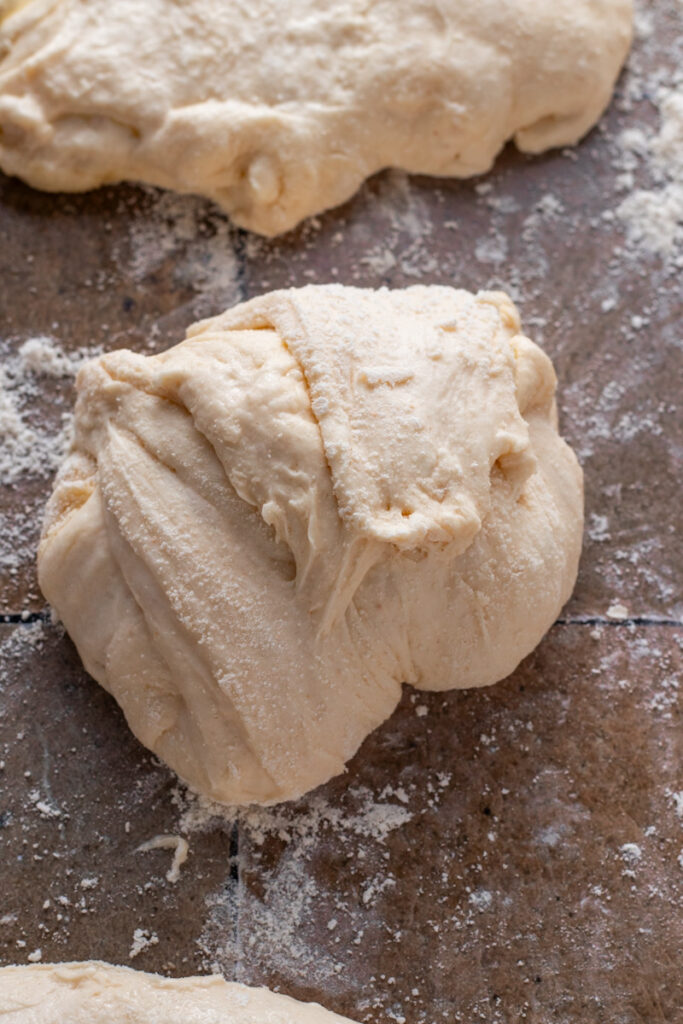
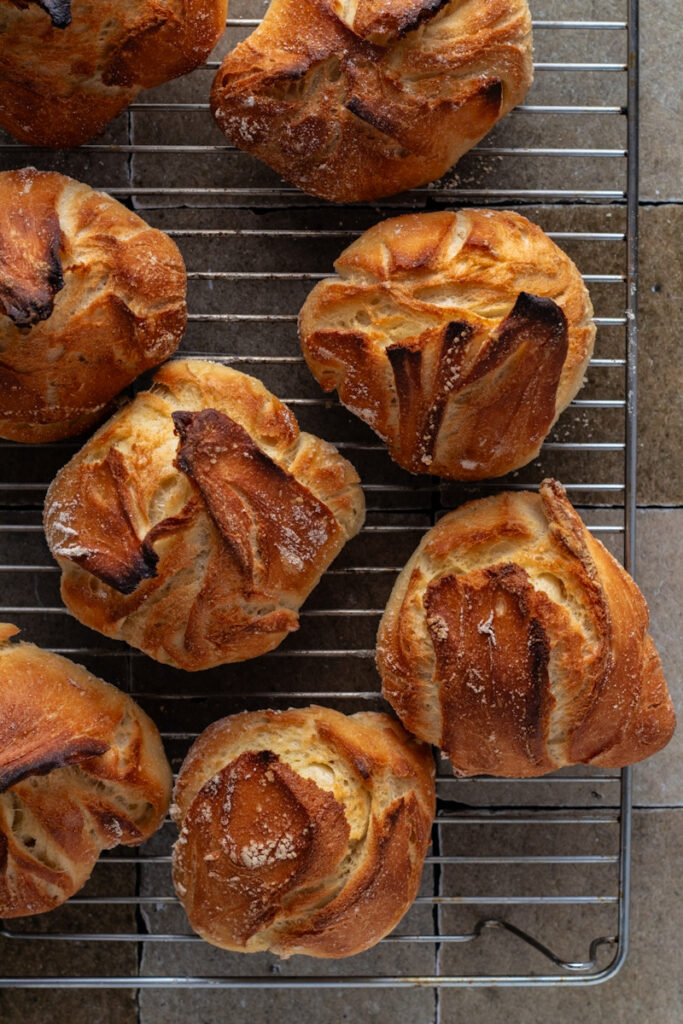
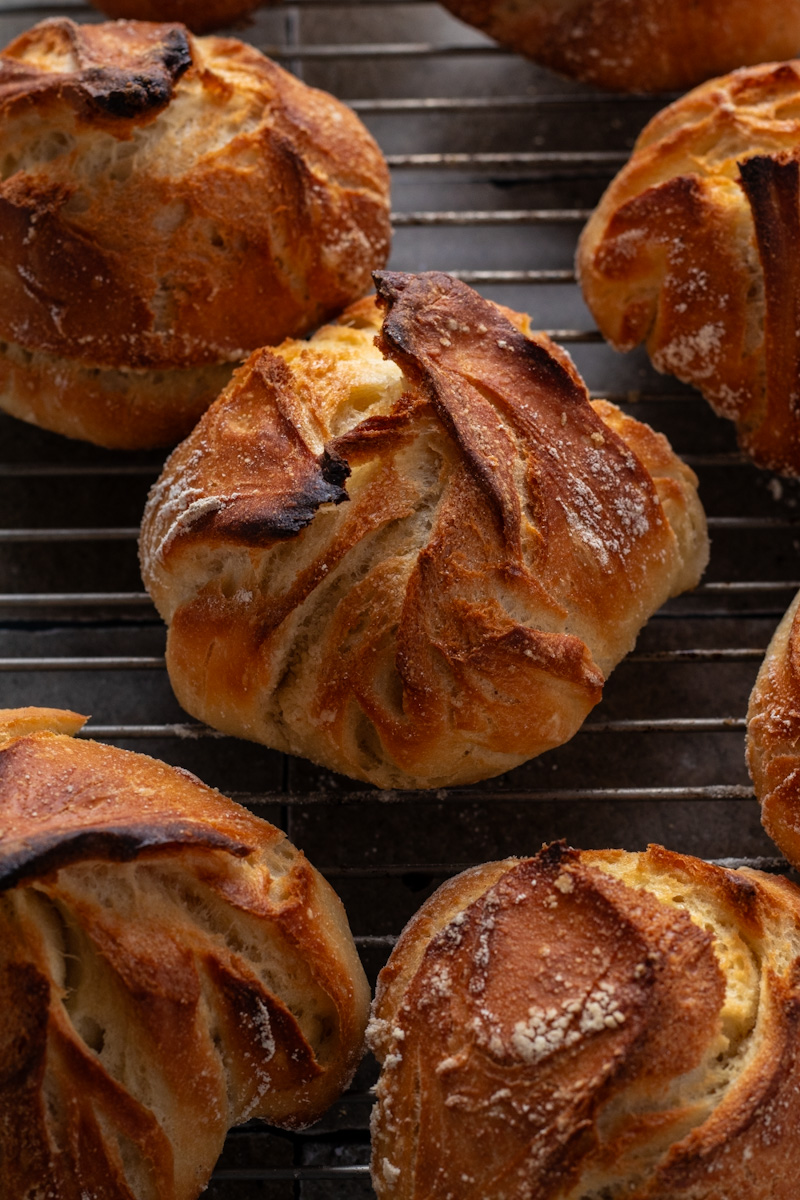
- The next morning, remove the dough from the fridge and heat the oven to 250°C / 475°F / Gas 9 with a baking sheet in the middle shelf and a metal roasting dish or bowl on a rack on the bottom shelf. Turn the dough out onto a well-floured surface, divide it into 8 pieces using a bench scraper or a sharp knife (stone bench tops only with the knives please!) and shape by picking up the diagonally opposite corners of each, crossing them over, then repeating with the remaining corners.
- Place each prepared dough ball onto a piece of baking parchment paper and prepare a small glass of water. When the oven is hot, use thick oven gloves to remove the very hot tray from the oven. Drag the baking paper and rolls onto the hot tray, return it to the oven, then pour the water quickly into the hot roasting dish or bowl and close the door. Bake for 20 minutes until well-risen and golden brown. Transfer to a cooling rack and then dig in!
It might sound a little confusing at first, but I promise, it couldn’t be simpler!
The complete ingredient list and detailed instructions are in the recipe card at the bottom of the page.
Frequently Asked Questions
This recipe takes a long time! Can I make it quicker?
The long time the dough spends in the fridge develops flavour as well as the gluten for a better texture. However, it is possible to fast-forward this recipe a little bit. I have mixed the dough at 2pm and removed it from the fridge just before 5pm to have the rolls ready in time for dinner. Both types of rolls are in the photographs for this recipe… can you can spot the difference?
Can I use other flour to make these rolls?
Other flours will have different results, so you’ll need to experiment. If using whole wheat flour only add about 100g. I would not recommend Gluten Free flour with this technique.
How do I store these bread rolls?
These are lovely crunchy rolls on the first day and are perfectly good on the second day too. Once cooled I wrap them in a clean cloth and store them in a bread bin (or the microwave!)

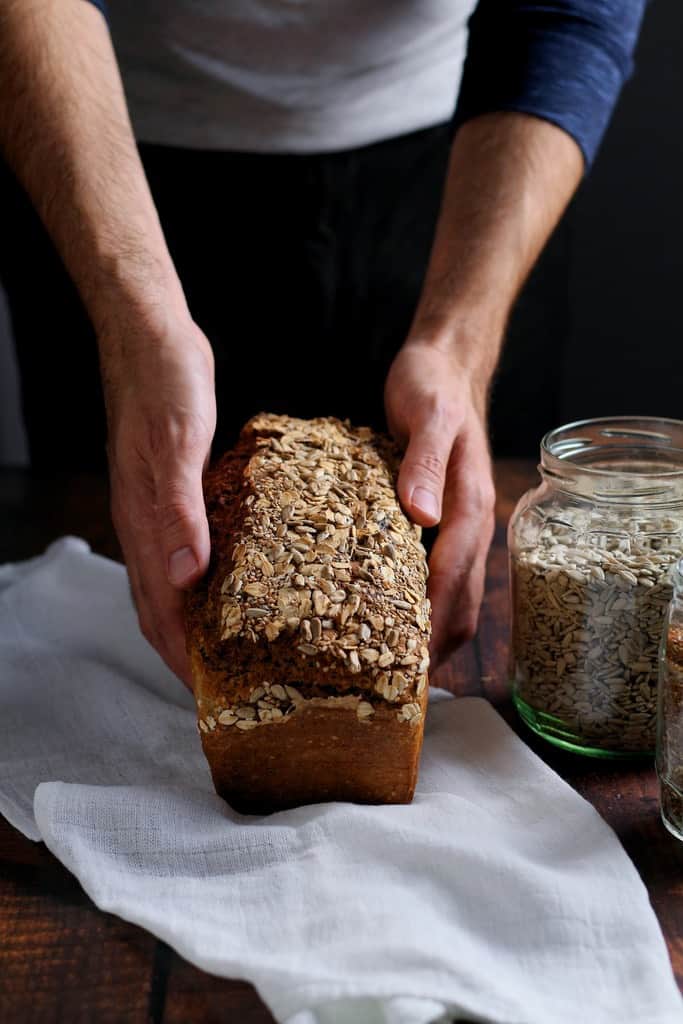
Looking for more easy bread recipes?
Crusty Rolls Recipe Card
Easy Overnight Bread Rolls
I love fresh bread in the morning, but I love it even more when it is as easy to make as these overnight bread rolls. No kneading, an overnight rise in the fridge, then a quick shape and they're into the oven in time for breakfast. Easy and delicious with a wonderfully crunchy crust, this recipe is ideal for bread-making beginners.
Ingredients
- 500 g all-purpose flour, bread flour or white spelt flour
- 10 g white sugar
- 10 g sea salt or kosher salt
- 10 g fresh yeast, or 5g instant yeast
- 350 ml cold water
- 1 Tbsp vegetable oil
- fine semolina or extra flour for dusting
Instructions
- MIX DOUGH: Whisk the flour, sugar and salt together in a large mixing bowl. Stir the yeast into the water until dissolved, then pour into the flour mixture and stir until a shaggy dough forms. Scrape out onto the work surface, oil the bowl well, then return the dough to the bowl. Cover with clingfilm or plastic wrap and refrigerate for 8-10 hours.
- PREPARE: The next morning, heat the oven with a baking tray in the bottom third to 250°C / 475° F / Gas 9. Place a rack in the bottom of the oven with a small metal baking dish or bowl for the steam. Place a sheet of baking parchment paper near the oven.
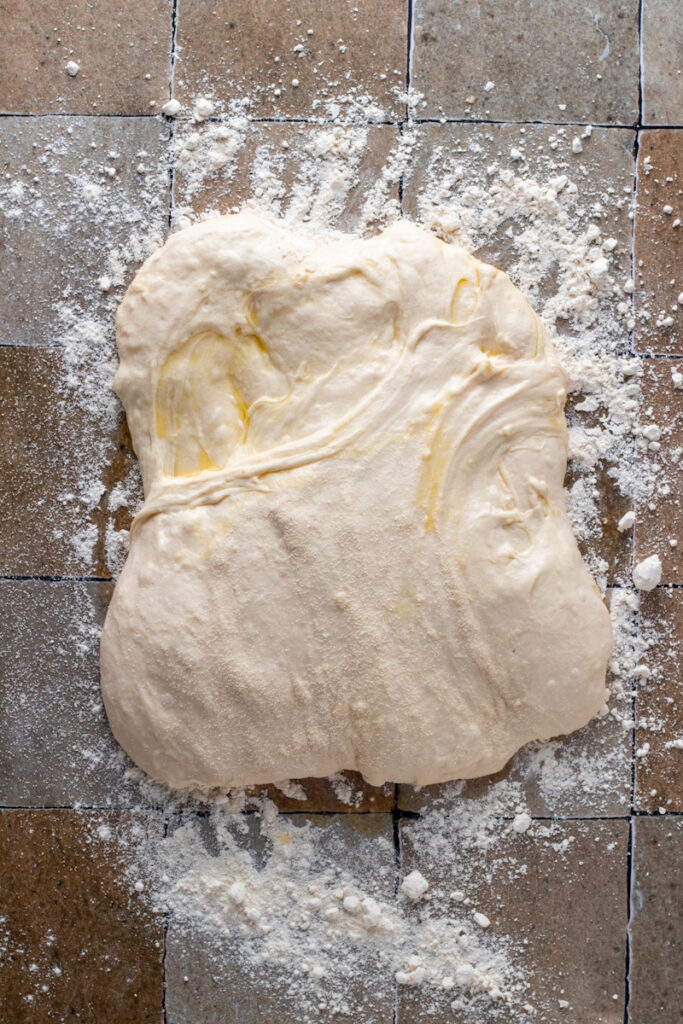
- RELEASE DOUGH: Remove the cold dough from the fridge, generously flour or scatter semolina over the work surface and the top of the dough, then invert the bowl onto the floured surface and allow the dough to fall gently out. It will take a minute or two, but you want to keep as much air in the dough as possible, so be gentle if it needs any help releasing from the side of the bowl.
- CUT AND SHAPE DOUGH: Use a bench scraper to cut the dough into 8 roughly equal portions. Lightly oil your fingers, then working one at a time, shape the rolls by picking up two diagonally opposite corners and crossing them over the dough, Repeat with the other two corners, then transfer the roll to the prepared baking paper. Repeat with each remaining piece of dough.
- BAKE: When the oven is hot, prepare 50ml of warm water in a small glass. Wearing thick oven gloves, remove the baking tray, slide the baking paper with the rolls quickly and carefully onto the hot tray then return it to the oven. Pour the water into the heated metal dish or bowl to create a gush of steam, then quickly close the oven door. Bake rolls for 20 minutes until risen and golden brown then cool on a wire rack.
Notes
- This dough based on the famous method by Jim Lahey has extremely high hydration, meaning it is a very wet, very soft dough. Trust the process! While all flour is slightly different, these rolls are fairly fail-safe. If they are so sticky you can’t manage them even with oiled hands, dust them with a little extra flour. I like to scatter a little fine semolina over the top of each roll before baking to give them a rustic texture.
- Adding water to the hot oven creates steam, which helps these rolls rise and gives them their deliciously crunchy crust. Adding the water to a hot metal container will protect the bottom of your oven.
- If you have a pizza stone / baking stone and peel, use that instead of a hot baking tray, but do use baking parchment paper, the wet dough is very sticky.
- If you don’t want to use sugar, simply leave it out. I recommend that you use it though for the best results. Even if it wasn’t consumed by the yeast, it would still only work out to a tiny 1.25g per roll or 1/40th of the RDI for sugar. To put that in perspective ONE Grande Pumpkin Spice latte has 50g of sugar in it!
- YEAST: Fresh yeast is commonly available in Germany/ Europe and (IMHO) gives a much superior result when baking.
- In Australia, it is available at Harris Farm Markets (yay) and some Asian/other ethnic food stores.
- In the United States, Eataly stocks fresh yeast, or Red Star Brand yeast is sold in some stores. If you have a bakery near you they are often very happy to sell you a small portion to take away.
- In New Zealand, it is easily available to order online.

As an Amazon Associate and member of other affiliate programs, I earn from qualifying purchases.
Nutrition
Serving: 1 roll | Calories: 249kcal | Carbohydrates: 49g | Protein: 7g | Fat: 2g | Saturated Fat: 0.4g | Polyunsaturated Fat: 1g | Monounsaturated Fat: 0.5g | Trans Fat: 0.01g | Sodium: 486mg | Potassium: 75mg | Fiber: 2g | Sugar: 1g | Vitamin C: 0.001mg | Calcium: 10mg | Iron: 3mg
Tried this recipe?I’d love to hear how it went! Please leave a review or a star rating and let me know how it was! Use the hashtag #daysofjay on Instagram so I can see your delicious creations.


About the Author
Jay Wadams is a cookbook author, food photographer, and graduate of Le Cordon Bleu in Gastronomy and Nutrition.
Based in Italy 🇮🇹 Germany 🇩🇪 and Australia 🇦🇺.


Jay, these rolls were perfect and husband appreciated for our picnic lunch. Thanks for yet another reliable recipe.
We really enjoy your hot pepper jelly recipe too which is a success time after time.
Happy Easter baking!
Hi Helen, so lovely to hear from you! I am absolutely delighted that the rolls were such a success! And thank you for your kind words about my pepper jelly, it is a real favourite of mine, and always brings back lots of happy memories for me. You are 100% right, my kitchen looks like a proper bakery right now as I am in the midst of recipe testing for my new cookbook! I did manage to squeeze in a little time yesterday to make a batch of hot cross buns, yum! Happy Easter baking to you too, and thank you so much for taking the time to write 🙂 J.