
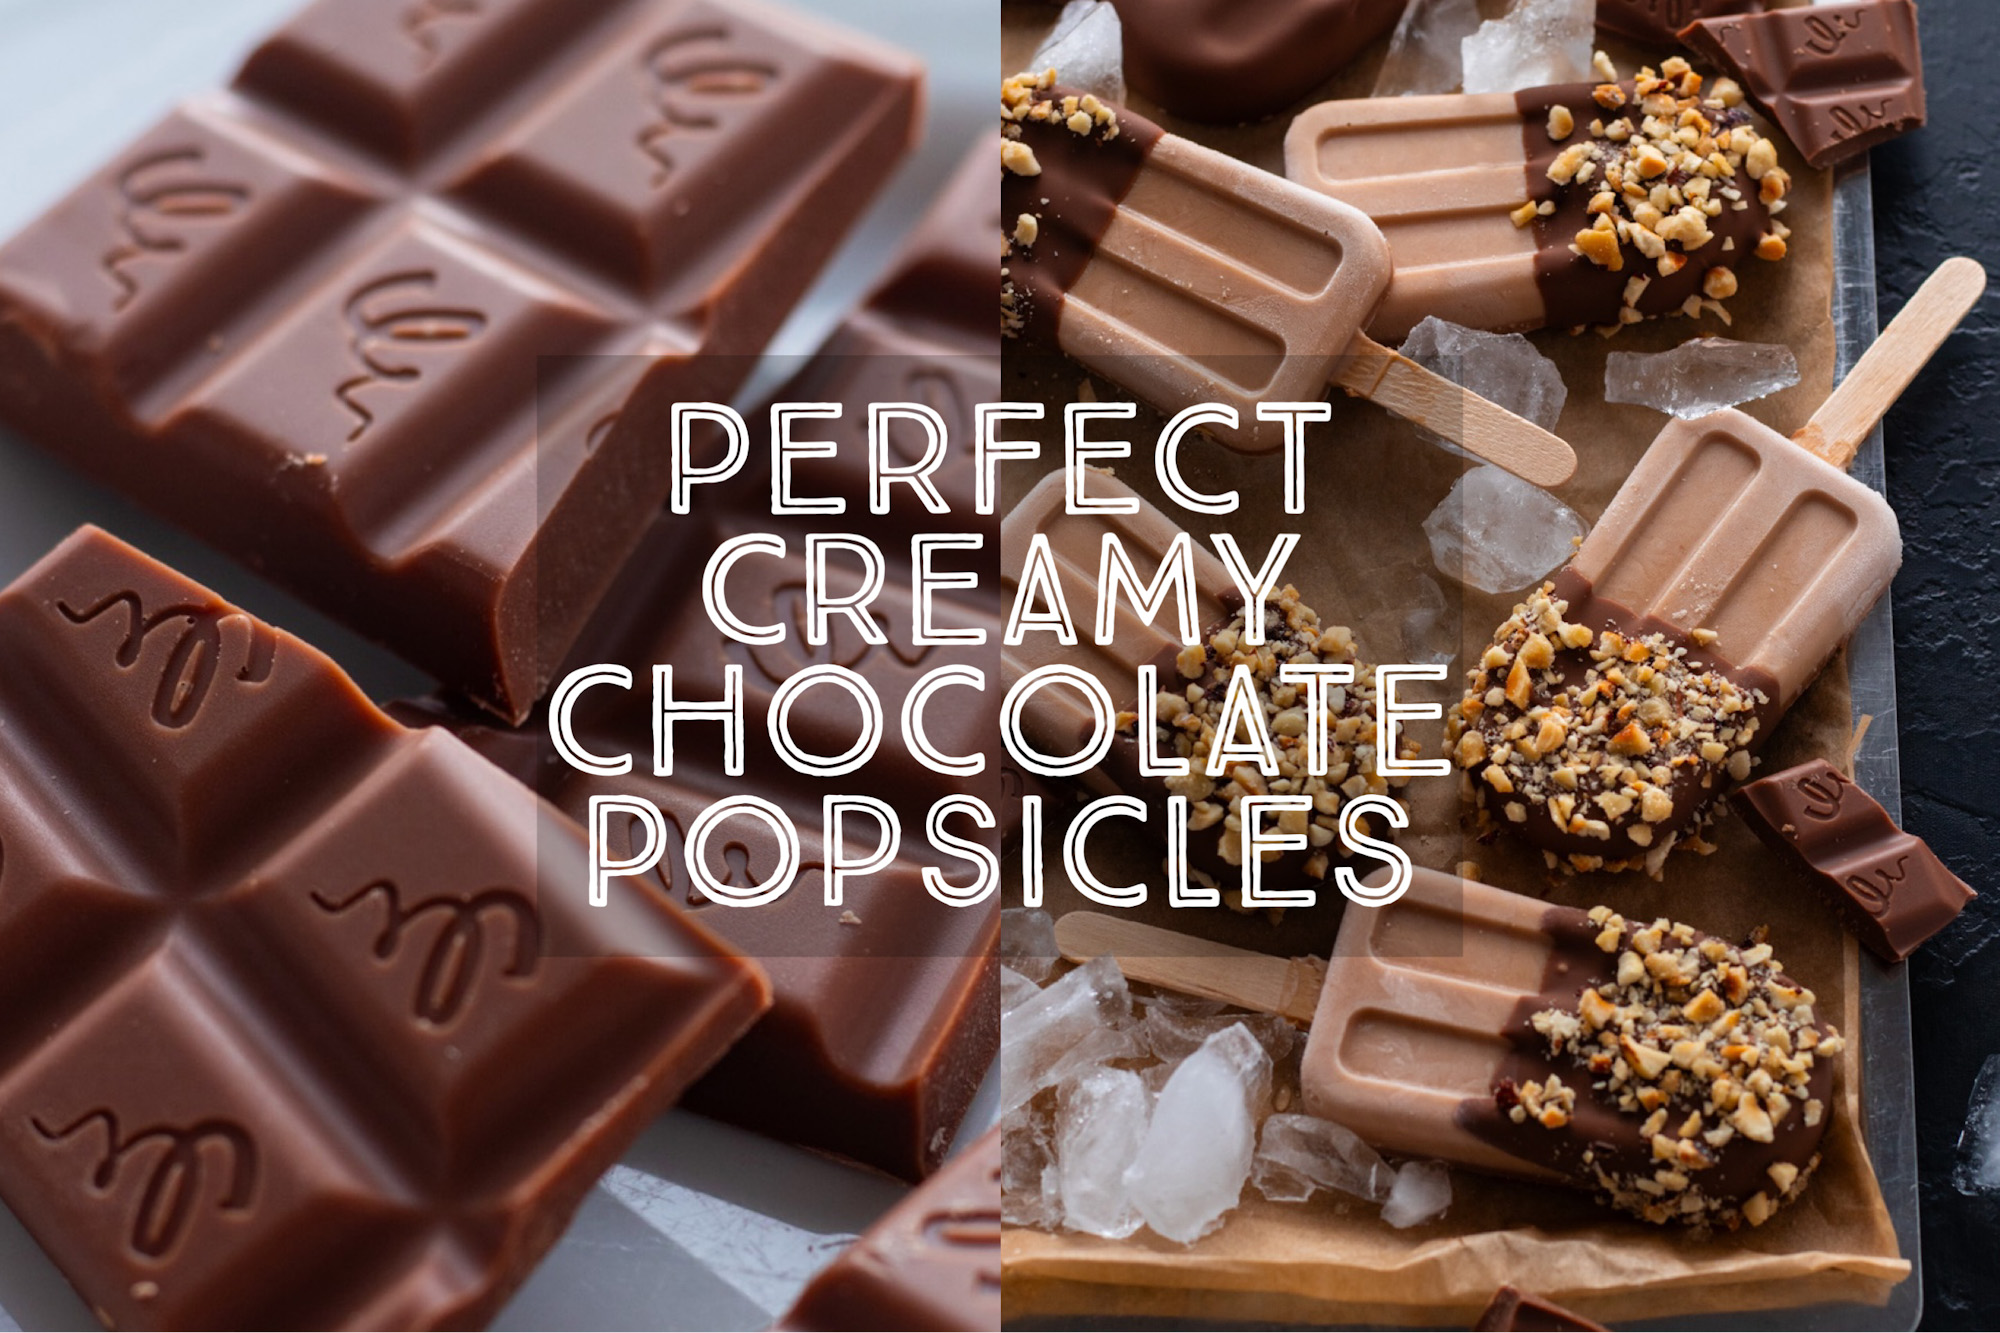
Homemade Chocolate Popsicles
Forget the ice cream truck! You won't believe how easy it is to make the most DELICIOUS Creamy Chocolate Popsicles at home with just 2 ingredients. The perfect way to cool down on a hot summer day, this delicious treat is so easy. The hardest part is waiting for your homemade fudgesicles to freeze!
You are not going to believe how incredibly easy it is to make Homemade Chocolate Popsicles! I have been experimenting with this recipe for YEARS and am so excited to share it with you.
Forget about popsicles from the grocery store, which are full of chemicals and weird ingredients. Forget about no-churn recipes packed with coconut cream and saturated fat.
TABLE OF CONTENTS
▼
These chocolate popsicles are creamy, easy and made with just two simple ingredients. I know you are going to love them!
About This Recipe
It’s not often that I am so excited about a recipe, but this one is a game-changer. With just two ingredients and 5 minutes of prep time, these popsicles are ready to go in the freezer.
After a few hours of waiting time (definitely the hardest part), you’ll have deliciously creamy, super (and I mean SUPER) chocolatey popsicles that are so good, you’ll never buy store-bought again.
Ingredients
As hard as it is to believe, my homemade Chocolate Popsicles recipe has only 2 components! No added sugar, high fructose corn syrup, stabilisers or chemicals, just simple (relatively) healthy ingredients.
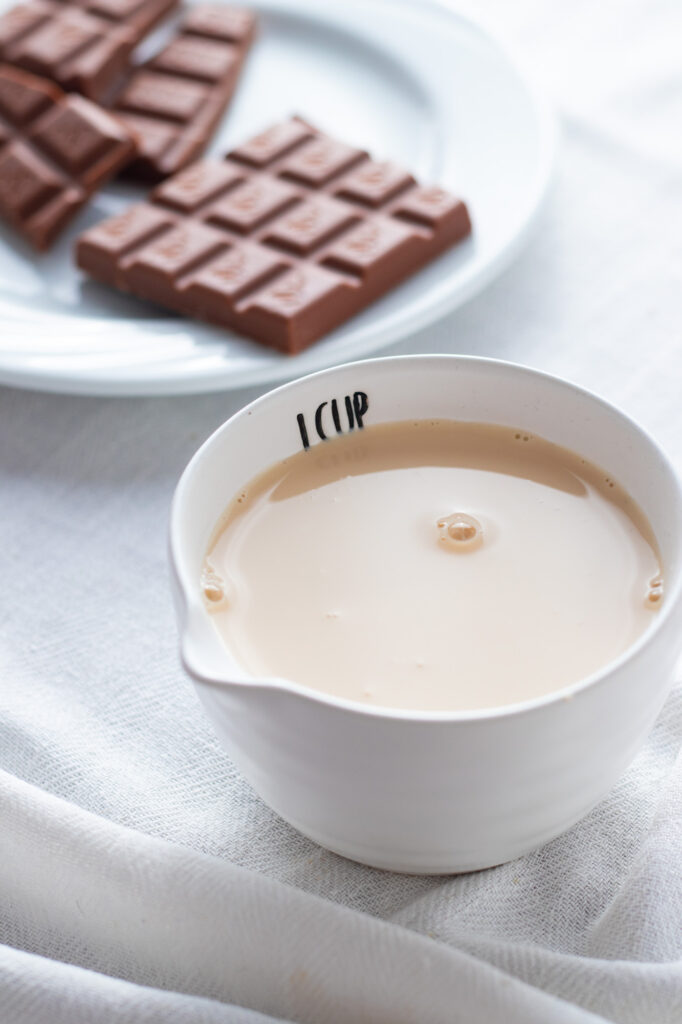
- Evaporated Milk: This is the important one. Evaporated milk (not sweetened condensed milk) provides an incredibly rich and creamy base for our popsicles. The fantastic thing about this ingredient is that you get a wonderful creamy texture with a fraction of the fat of heavy cream or coconut cream.
- I use a no-brand evaporated milk (Kondensmilk) from Aldi in Germany, but you’ll be using Carnation brand evaporated milk from Nestle in most countries. Depending on your location, it will have between 8% and 10% fat content.
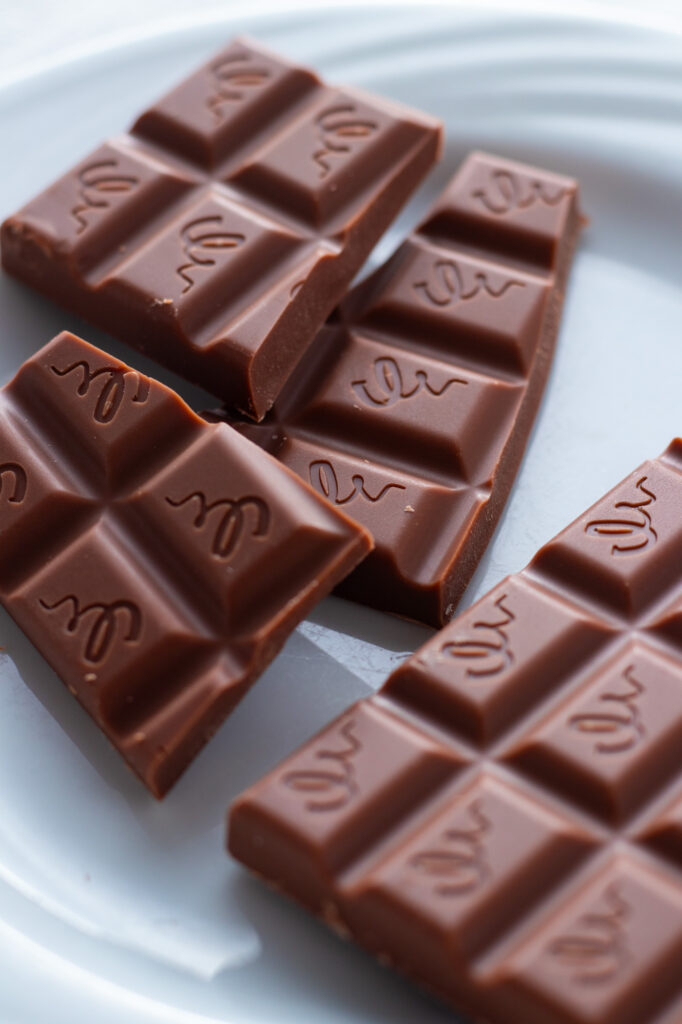
- Milk Chocolate: This is where the flavour comes in. I use good quality German milk chocolate with at least 30% cocoa.
- You could use chocolate chips or whatever you have, though I urge you to use the best quality you can afford. When you only have two ingredients, the quality will be noticeable, so indulge your inner chocolate lover and get the good stuff for the most intense chocolate flavor.
The complete ingredient list and detailed instructions are in the recipe card at the bottom of the page.
Instructions
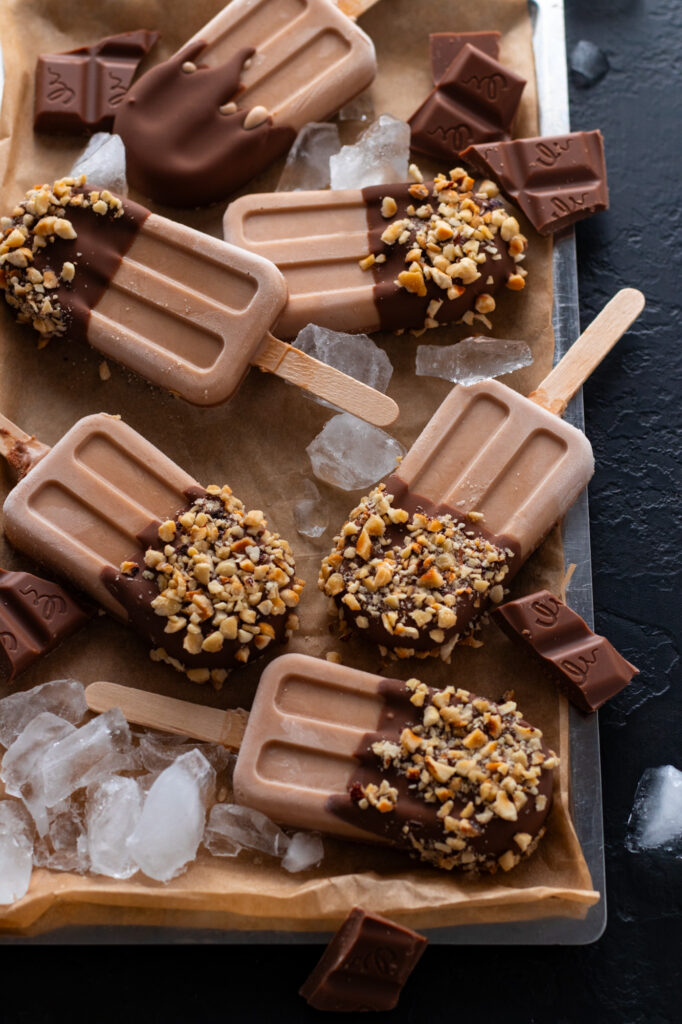
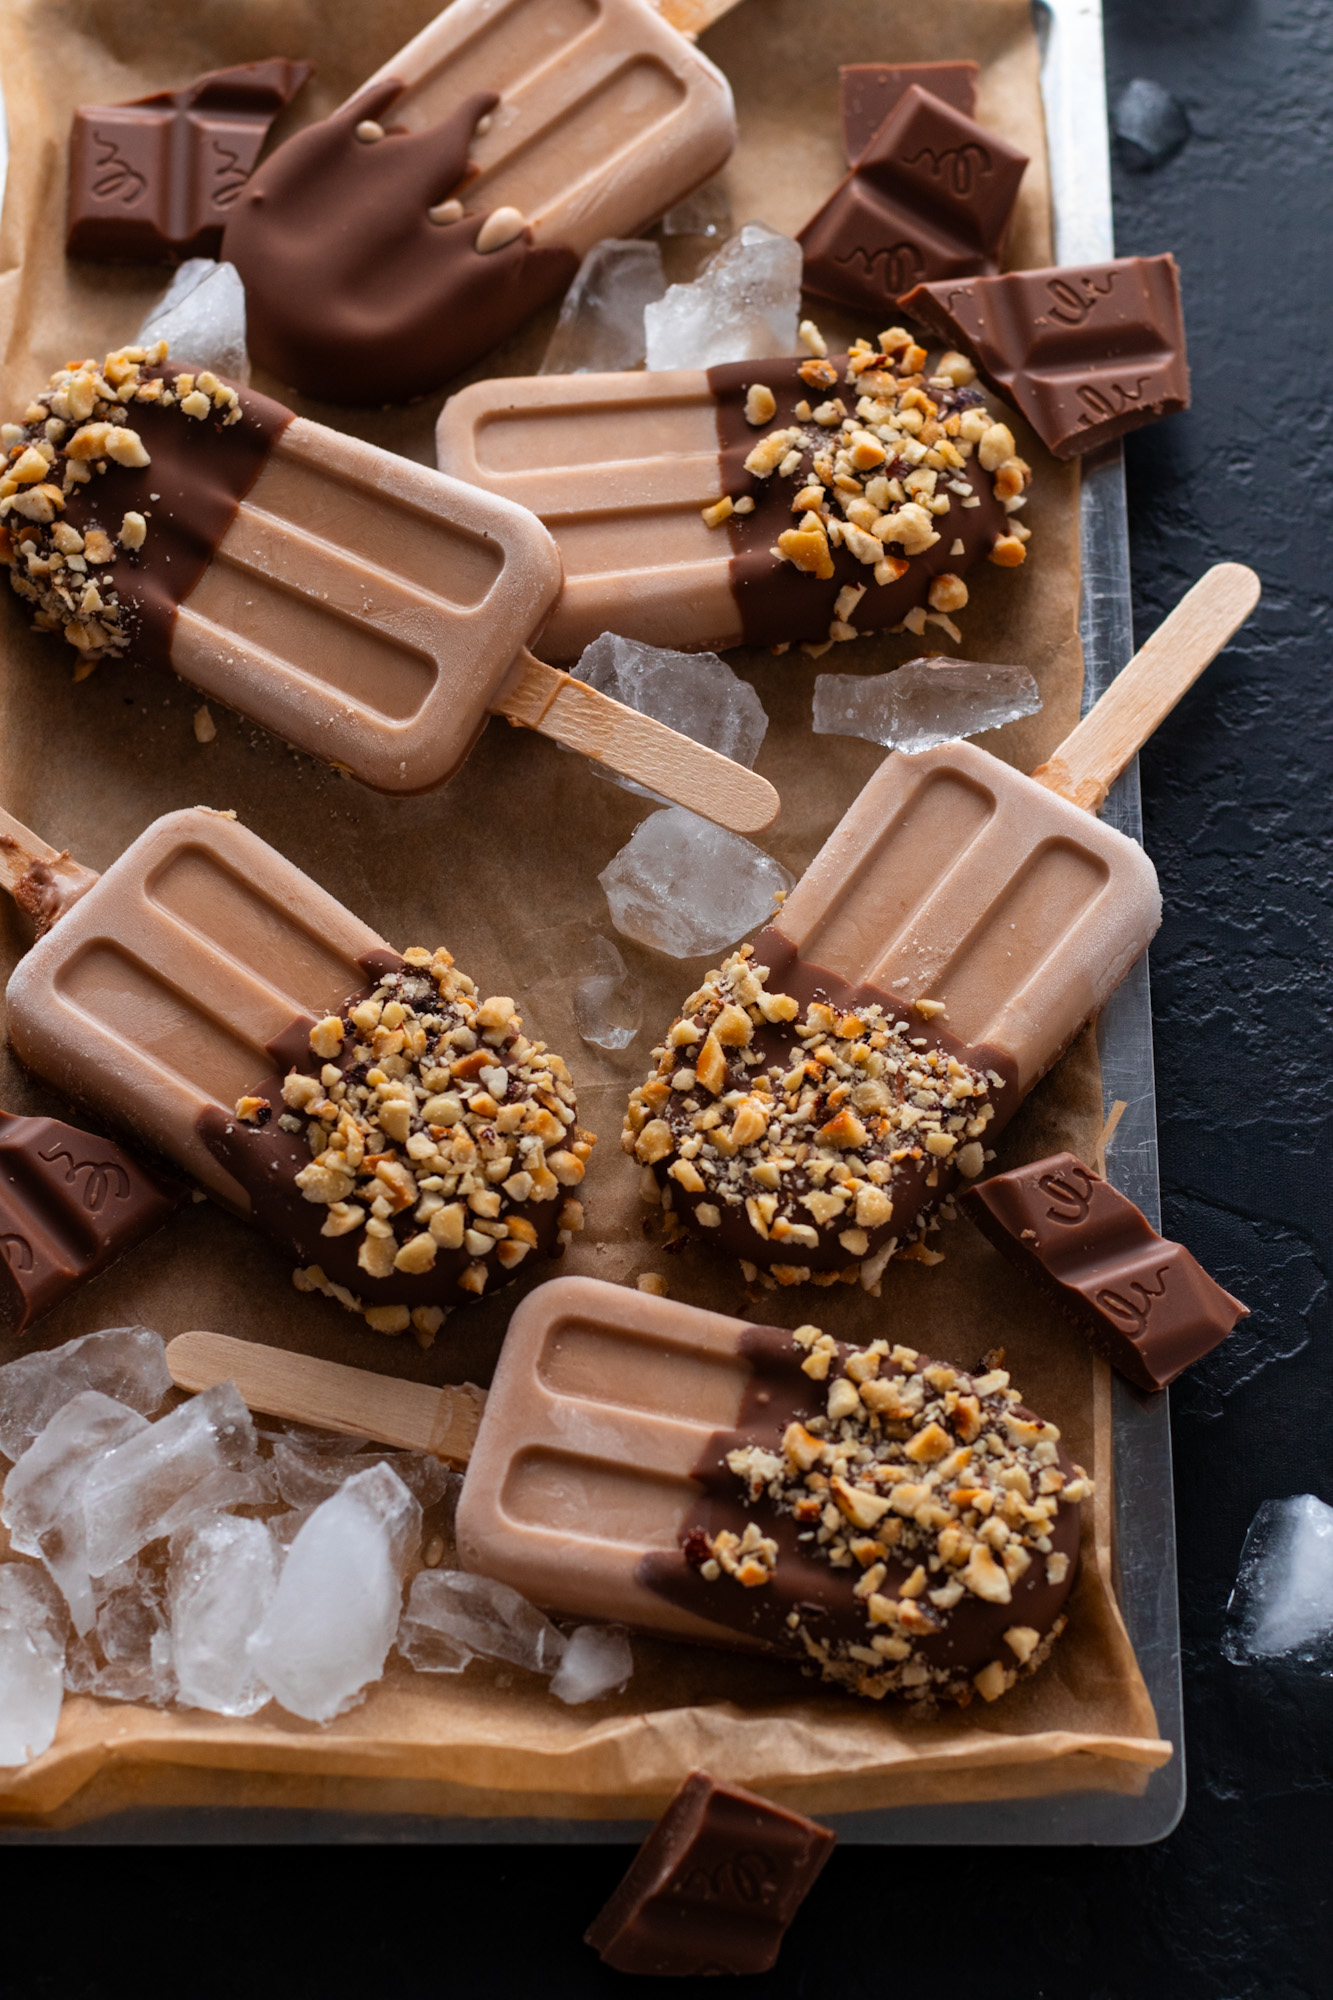
Making your own fudgesicles, chocolate popsicles, or chocolate ice lollies couldn’t be simpler! There are only 2 main steps, with some optional extras if you want to bling them up like the ones in the photos. Whichever way you go, this is a seriously easy recipe.
- First, heat the evaporated milk until it is nearly boiling, then remove it from the heat. Add the chocolate and allow it to stand for 5 minutes.
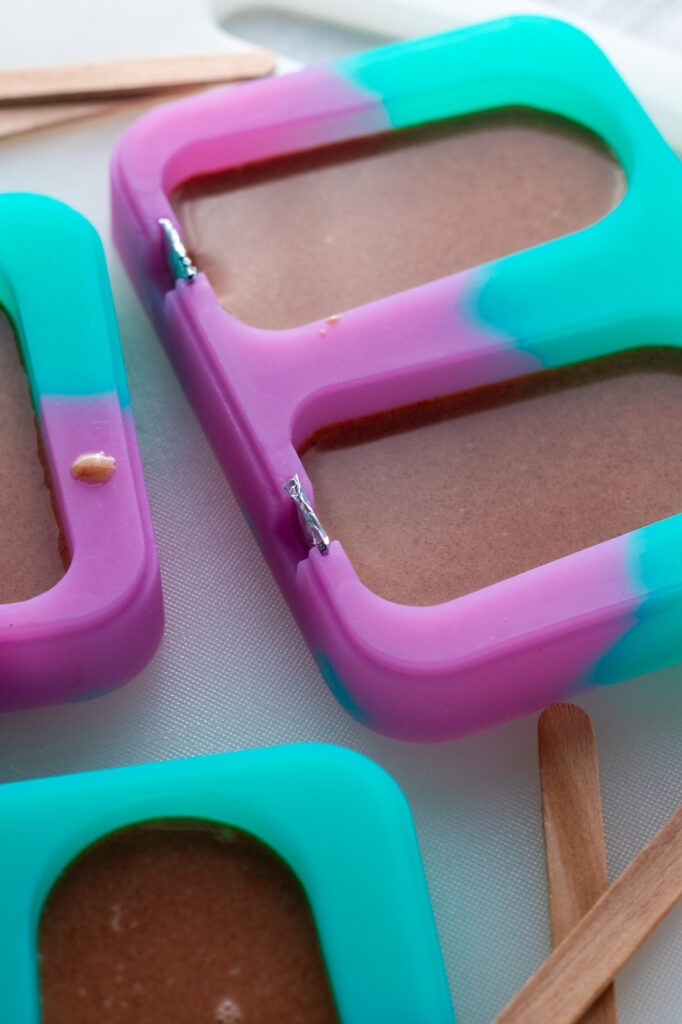
- After 5 minutes, stir the mixture until smooth, then pour it into silicone popsicle molds. Then, pop them in the freezer for a few hours until solid. Done!
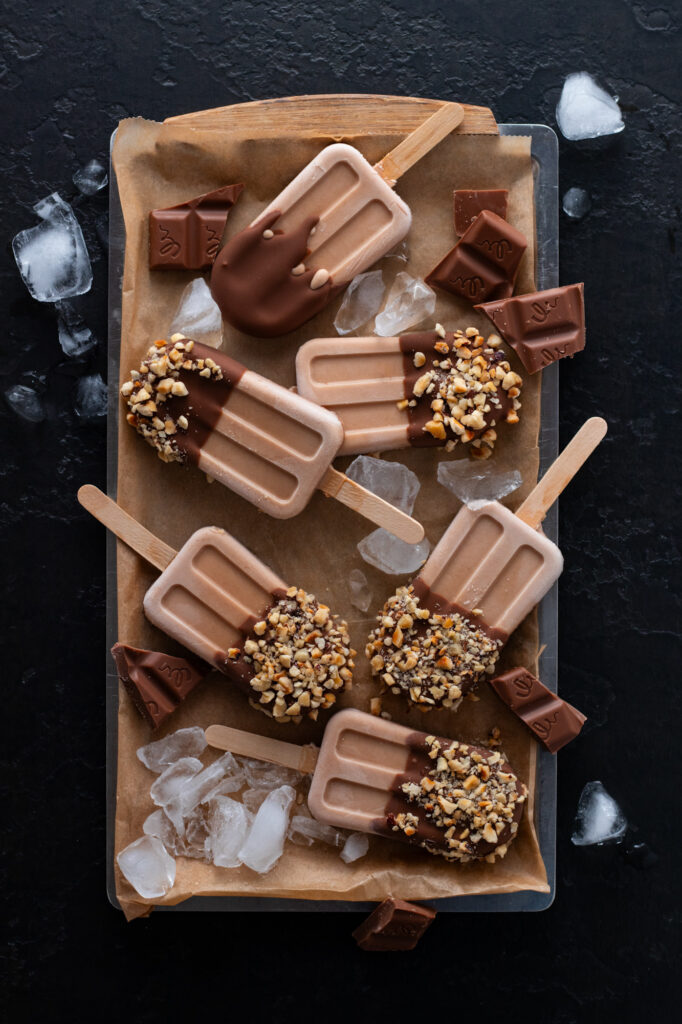
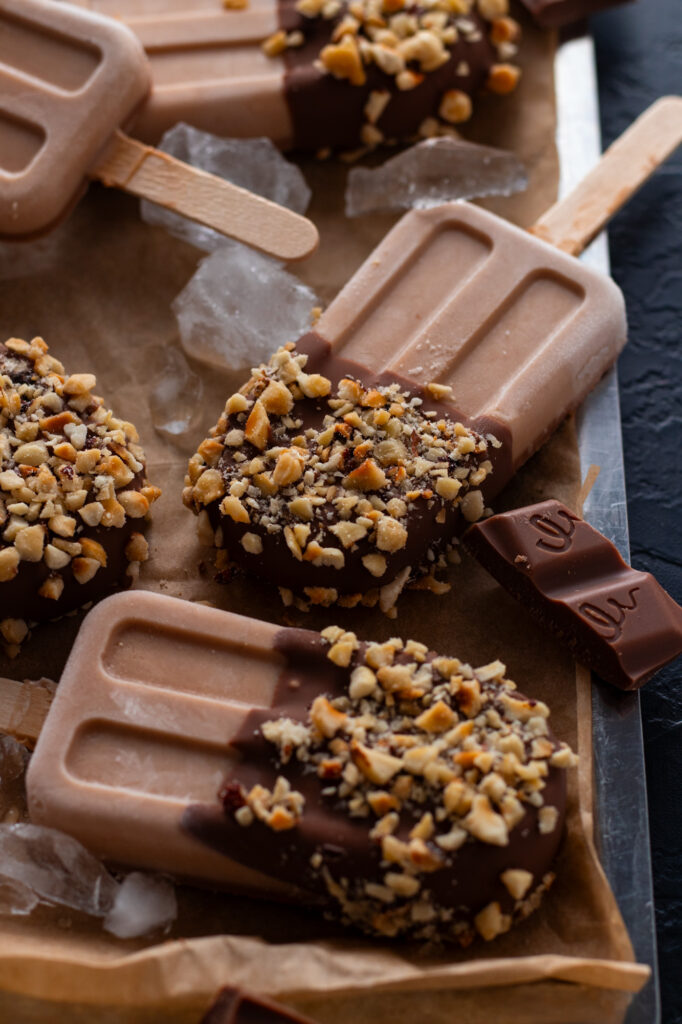
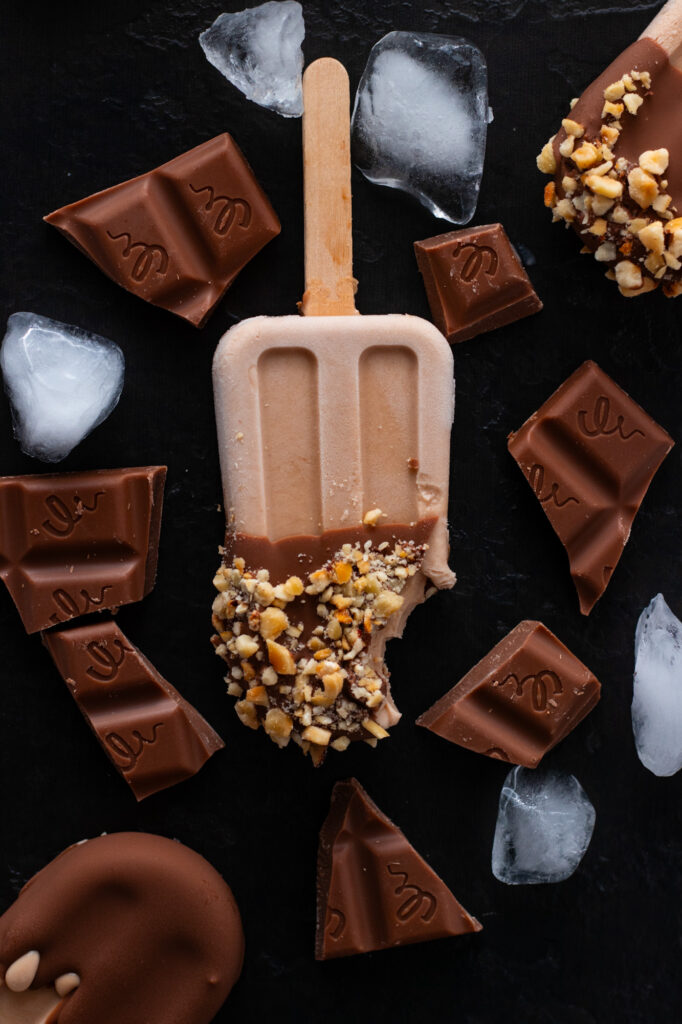
- If you want to go all out, dip your frozen pops in melted chocolate and roll the dipped popsicle in chopped nuts to finish them off. Lay them on a baking sheet lined with parchment paper and freeze again. Let me tell you, it is sooo worth it and a great way to make these extra special.

Equipment
To get the best and most beautiful popsicles, I use and recommend silicone popsicle molds; you’ll find a link in the recipe card to some I like.
If you don’t have popsicle molds, get creative and see what you have in the kitchen. Silicone ice cube molds would bake delicious bite-sized sweet treats.
Storage
Once my popsicles are frozen (and I mean properly, as in overnight), I layer them up in an airtight container or freezer bag with layers of baking parchment paper between them. The paper isn’t strictly necessary but is a good insurance policy if your freezer temperature fluctuates.
Frequently Asked Questions
Can I make chocolate popsicles with chocolate milk or a milk alternative like full-fat coconut milk?
No, this recipe requires evaporated milk to work. Evaporated milk has had a lot of moisture cooked out of it, which is what gives these homemade popsicles their wonderfully creamy texture.
Can I make different flavors?
Yes! I am still experimenting with this, but using a berry syrup instead of the chocolate will work, too, though I am still perfecting the texture. Watch this space!
How long will my homemade popsicles keep in the freezer?
They will last at least three months as long as they are wrapped well to prevent freezer burn. I am betting they are all eaten up by then, though!
Can I double or triple the recipe to make a larger batch?
Of course! Keep to the ratios: 50g (1.75 oz.) chocolate to 250ml (1 cup) evaporated milk.
Looking for more cooling treats? How about some refreshing Kiwi Granita?
Homemade Chocolate Popsicles Recipe
Homemade Chocolate Popsicles
Forget the ice cream truck! You won't believe how easy it is to make the most DELICIOUS Creamy Chocolate Popsicles at home with just 2 ingredients. The perfect way to cool down on a hot summer day, this delicious treat is so easy. The hardest part is waiting for your homemade fudgesicles to freeze!
Ingredients
- 250 ml evaporated milk, see notes
- 50 g milk chocolate
optional:
- 200 g milk chocolate
- 1 Tbsp shortening
- 100 g chopped hazelnuts
Instructions
- HEAT THE MILK: Pour the evaporated milk into a small saucepan and heat over medium heat until just under simmering; tiny bubbles should form around the pan's sides. Remove from the heat.
- CHOP THE CHOCOLATE: Chop or break the chocolate into small pieces, add to the hot milk mixture and allow to stand for 5 minutes.
- STIR AND POUR: After 5 minutes, stir the milk and chocolate mixture with a spoon. At first, it will look like it won't mix, but be patient and keep going until you have a smooth mixture. Divide the chocolate mixture evenly between a 6-hole popsicle mold (see notes). If your mold has integrated sticks, you can insert these now.
- FREEZE: Freeze the popsicles for at least 4 hours (preferably overnight) until firm. If you are using wooden popsicle sticks, check on the popsicles after one hour. If they have started to freeze, push the popsicle sticks in and return to the freezer.
- OPTIONAL DECORATION: If you want to really take these popsicles to the next level, melt 200g (7 oz.) of milk chocolate in a small bowl set over simmering water. Stir in the shortening and stir until thoroughly combined. Remove from the heat and allow to cool for a couple of minutes before dipping the popsicles into the chocolate, dipping into the chopped hazelnuts and placing them on a tray lined with baking parchment paper. Return to the freezer as quickly as possible and freeze until solid.
Notes
Evaporated milk: Be sure that you are using unsweetened evaporated milk. A common international brand of this is Carnation by Nestle. It should have around 8-10% fat content. In Germany, this is sold as Kondensmilk (NOT sweetened condensed milk).
Chocolate: Use a good quality chocolate with at least 30% cocoa solids. The better quality the chocolate, the better your popsicles will taste.
Popsicle Molds: I use an excellent silicone mold that I picked up at Kmart in Australia, and it makes life VERY easy. If using hard molds, you may need to run them very briefly under warm water to release the popsicles. To use the mold recommended below, double the recipe.

As an Amazon Associate and member of other affiliate programs, I earn from qualifying purchases.
Nutrition
Serving: 1popsicle | Calories: 290kcal | Carbohydrates: 30g | Protein: 5g | Fat: 20g | Saturated Fat: 11g | Polyunsaturated Fat: 1g | Monounsaturated Fat: 7g | Trans Fat: 0.3g | Cholesterol: 13mg | Sodium: 54mg | Potassium: 255mg | Fiber: 2g | Sugar: 26g | Vitamin A: 106IU | Vitamin C: 1mg | Calcium: 126mg | Iron: 1mg
Tried this recipe?I’d love to hear how it went! Please leave a review or a star rating and let me know how it was! Use the hashtag #daysofjay on Instagram so I can see your delicious creations.


About the Author
Jay Wadams is a cookbook author, food photographer, and graduate of Le Cordon Bleu in Gastronomy and Nutrition.
Based in Italy 🇮🇹 Germany 🇩🇪 and Australia 🇦🇺.


Wonderful recipe!
Made these for my type 2 diabetic husband
What a treat!
Thank you for this marvellous clever treat
Hi Trudie! Oh so am delighted that you liked this recipe as much as I do! Thank you so much for your lovely message and I hope you and your husband are enjoying these ice creams today! J.